Except for one...
Mainly that, especially in Arizona, when you buy polymer clay, give the corner of the block a squeeze to make sure it's still soft. The clay can actually get partially baked in a truck on the way to and waiting to get into the store. I actually try to avoid buying any clay in the summer. It can baked in your car on the way home, too! If I do manage to find some soft clay in summer, I buy it and immediately put the block(s) of clay into my purse for transporting home. My purses will usually stay pretty cool inside. Never, ever leave raw clay in your car. It will bake, but not enough to be truly done. Only enough to be completely unusable.
But you're really here for the tutorial. ^_~ Here are more detailed instructions for the demo I did on the news.
Pebble Pieces Tutorial

To make these pieces, you'll need some polymer clay, a rubber stamp, and a circle cutting tool. This can be as simple as cutting the bottom off of a straw. Cut it at a slight angle, then clip off any sharp point you made. This helps you remember which end is the flat end. Also, cut the straw slightly shorter than a toothpick so that you can use the toothpick to push the clay back out once you've cut.

Knead your clay pieces until they're soft and easy to work with. Roll them into a ball.

Squash the ball with the palm of your hand and then with the heel of your hand to create a nice, rounded pebble shape.

Rub over the surface of the clay with your fingers to smooth away any prints.

Stamp the clay to create texture.

Cut your hole(s) where desired with your straw piece.

Here's the cut hole and the toothpick pushing the clay back out of the straw. You can use this same straw over and over again, and the little piece of clay you push out can be used to make smaller charms using almost the exact same methods you used to make the big piece.

To accent with acrylic paint, use an old paint brush to pounce paint into all the recesses. (This is a different clay piece than the pieces shown above... it's a bracelet link rather than a pendant.)

Wipe off the excess clay and you're left with a beautifully accented piece for your jewelry. This is so incredibly simple, you'll feel like you cheated. ^_^
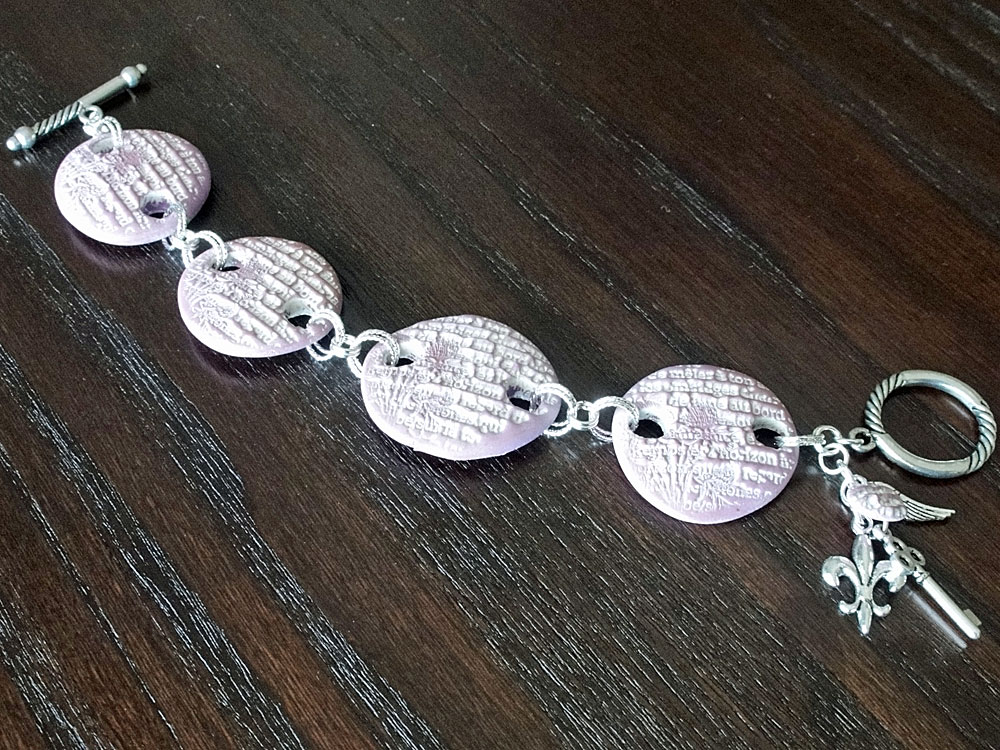
The finished bracelet I made with these simple pieces is so pretty... Tess (the news anchor) seemed most impressed with this one, and she held it up to show the camera.
This is honestly simple enough to do with your kids. Dad can sit with the kids and have them make presents for Mom for Mother's Day, for instance. The kids could make the initial pieces and Dad can do assembly. This entire bracelet was put together with nothing more than opening and closing jump rings. There was not a single bit of wire work in this piece, so if you can hold a couple of pliers and open and close a jump ring, you can make a bracelet like this one.

Here is a closeup shot of the little charm cluster at the end of the bracelet. You can see my tiny polymer clay charm. Basically, I rolled the tiny bit of clay pushed out of the straw into a ball, squashed it with my finger, then removed the prints, and stamped it. Then I picked it up, put it against my finger, and carefully poked through it with the toothpick to create the hole. It baked with the other pieces. You really can make these pieces as big or as small as you like. It's so fun and so easy, and, who knows? It could get you started in the world of polymer clay, which could keep you busy for a LONG time. ^_~
Huge congratulations! I am heading for 3TV's site to see if I can pull it up. Absolutely wonderful! So exciting. It is a great tutorial too, thank you for sharing. - Marlene
ReplyDelete